It’s funny that just as I move my studio to the heat of tropical Australia that I should be drawing a snowman. In this video I give you a short demonstration of my snow drawing technique and then show you the practical application of the technique in an artwork that I am creating for my art licensing portfolio. If you’ve got any questions feel free to ask; I’ll be happy to hear from you.
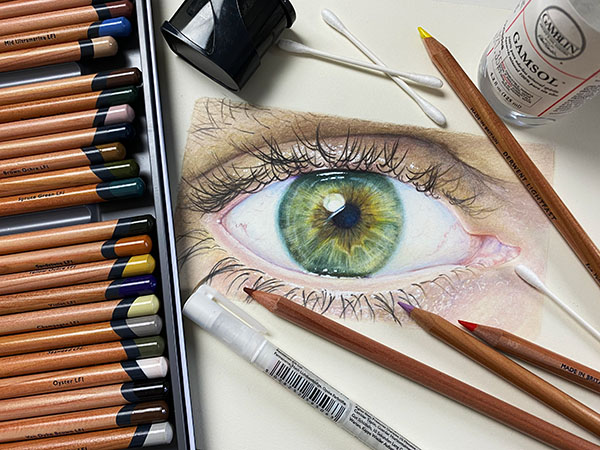
Art Materials Used
Video Transcript
Introduction
00:05
Here I am in gorgeous Far North Queensland on a bright and breezy, hot sunny day. Ironically though, I’m about to
head back into the studio and draw a snowman of all things. I don’t know about you but I can’t see any snow on those mountains back there.
So why am I drawing snow in the heat of tropical North Queensland. The reason is I’m developing my Christmas collection for my art licensing portfolio, and I just love that whole idea of a fantasy English 00:36
Christmas.
Believe it or not I had never actually seen the snow until about six years ago when we visited England at
Christmas time and it actually snowed. It was so beautiful and all of a sudden all my childhood fantasies came to life. Now I like to capture those moments in my artworks.
Practice Drawing – Deciding On Colours
00:57
Now before I begin on my practice work I decide on what colours I’m going to use. I’ve chosen some beautiful cool blues and a cool purple for my background colours and for all the shadows and I’m using some lovely warm colors yellows, and pinks for my highlights.
The Outline
01:13
I begin with the outline first. Then I add the accents depending on where the light source is. Accents are
little tiny darker areas that imply that there’s shadow. The light source in this case is coming from the upper right.
Drawing Accents
01:35
Now that I’ve created the outline and added some little accents to indicate where the shadows are I’m going to begin the shading. I’m just shading mostly in the area beneath the accents and just applying a little tiny bit in those highlight areas. The main emphasis is under those accents.
Blending Derwent Procolour
01:58
Now that I’ve added a bit of shading beneath those accents I’m going to blend with my stump and you can see how beautifully the Derwent Procolour just blends like a pastel. It’s just that bit firmer though than a pastel. It holds on to the page a bit more.
Now you can see I’ve left some of the paper blank where I’m about to add some highlight. I’ve chosen to use a beautiful primrose yellow which is a very pale yellow, number two, and rose pink number 19. I’m adding some of the yellow to create reflections for the highlights. And a little bit of pink to give it a bit of colour.
Getting Started Drawing the Snowman
02:49
And now I’ve finish my experimenting and I’m excited to get started on my snowman. The first thing I need to do is putty back the drawing outline. This is graphite pencil and it needs to be putted back so I’m just removing that. And now I’m ready to create the outline. I’m using blue violet lake for the outline. Just adding those little accents. And a bit of shading where those accents are.
Light direction
03:58
A really important part of this process is making sure that I remember where the light is coming from and you can see
already in this artwork that the light is really coming from this side here, so my shadows are going to be all towards the back of these shapes. I just keep on shading beneath any outlines that I create and all the while I’m thinking about where I’m going to have my highlights.
Naturally this area is rising up so I’ll leave that free for a bit of highlight later, maybe some beautiful pale yellow. Just making my way around adding some shadows with some darker areas just by applying pressure to the pencil. And a finer thinner line as it comes up towards the light, so darker and thicker and then lighter as it comes upward.
Using a Paper Stump
05:23
And I just keep on shading around the area that I feel is in shadow then I can begin my stumping. Yay! I love this part. Just blending that beautiful colour in. And it just creates that wonderful delicate shadow that I’m looking for.
St. Cuthberts Mill Saunders Waterford NOT pressed Paper
05:43
I also really love the texture of the paper and this is the beautiful St. Cuthbert’s Mill Saunders Waterford NOT pressed paper and I love it because it just allows that little tiny bit of texture that helps to make it look like snow.
Adding Highlights
06:01
And once I’m happy with some of the shadows in an area then I dive in and add some highlights. And I’m choosing my primrose yellow number two for this. So right where I think the sun’s just hitting the snowman and I’ll light that up with some gorgeous pale yellow and that just helps to give it form.
Now as I come towards the bauble see how they’ve got those beautiful reddish orange hues in there? I’m going to use some pale pink and a bright pink. This is rose pink and that just gives a bit of reflection into the snow because snow is never really white. Always add a little bit of colour to it. A bit of brighter colour right in close. This is cerise pink number 20.
Drawing the snow technique
06:48
So I’ve been busily adding all the snow to my snowman. I’ve even completed the hat and the scarf and the baubles and
let’s have a closer look at what I’ve actually been doing here. So remember the snow technique that I taught you earlier? You can see those beautiful purple lines there and I’ve blended just beneath. Now another thing that I’ve done is I’ve changed into the blue tones down in here as well, so I’m using these blue colours as it comes forward and that’s just to give it that a little bit of perspective.
Another thing I’ve done is added a brown around the edge that’s to give it that kind of cartoon element and animation
sort of feel.
Burnishing Technique
07:25
Now one more thing that I’ve been doing as well is burnishing. Now I’ve been burnishing with my white and that’s the stage I’m up to right now, so I’m just adding white over the top of all the shading that I’ve been doing, even over the outlines. I’m just burnishing by rubbing and creating little circular motions with my white with a blunt point tip. The reason why I’m doing that is to soften all of these lines and to create a lighter more smouldering sort of effect. Now I’ve already been doing this, so I’m just adding those final finishing touches now.
Conclusion
08:04
There! Now I’m really pleased with that. I would call that done! Now that I’ve finished creating my
snowman it’s time to start thinking about my next piece. If you’ve got any questions or comments at all I’d love to hear from you. I look forward to seeing you next time.



Love these characters! Thanks for sharing!