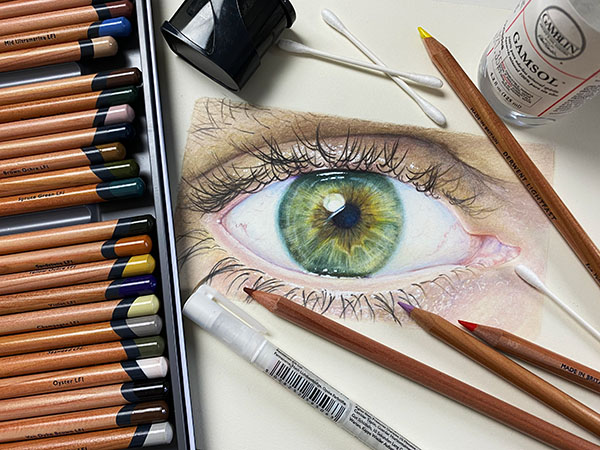
I am delighted to share this wonderful interview with our very own Tannis Trydal. Tannis is the co-author of our colored pencil units in the ‘Complete Drawing Certificate Course’ and in this image she creates a captivating portrait of her much loved grandchild Kara. Tannis has used the colored pencil medium so sensitively and with great patience as she diligently lays on layers of pigment to build up the gorgeous painterly application she has achieved here.
Working gradually through the various parts of the face Tannis uses soft edges, hard edges and gradations perfectly as she discovers and then creates the variety of full light areas, half tones, shadow edges, reflected light areas and cast shadows to achieve a gorgeous life-like portrait.
Tannis has masterfully created this portrait and in this interview she shares with us some of her tips, hints and inspirations along with some photographs of the process that took place while building up the layers of colored pencil to ultimately create this gorgeous image.
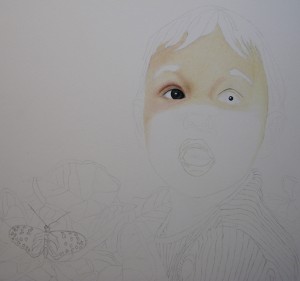
Step One
Q: Hi Tannis, this is another beautiful portrait that you have created. The application of coloured pencil is absolutely fantastic. Can you tell us what inspired you to create this gorgeous artwork.
A: Thank you, Cindy. My inspiration for this drawing is my gorgeous 2 year old granddaughter, Kara and her love of nature. Last spring my husband and I took her to the Calgary Zoo and she especially liked the Butterfly Conservatory. While we were there, a beautiful butterfly landed beside her. It was such a wonderful moment watching her reaction, first surprise, then wonder and glee as she thoroughly observed its beauty. She is such a little scientist!
Q: From the moment that you first decided to draw this artwork, what did you do next? Did you think up the composition or were you inspired by a photograph that you had taken?
A: Thankfully, I had my camera ready so that I could capture this special moment, however it wasn’t suitable to use as a reference because her little face was turned away from the camera too much. The butterfly portion of the photo was perfect but I needed a photo of her looking at the viewer with the right expression on her face so that I could put it all together. An almost Herculean feat! I poured through all of my photos of her but couldn’t find one that was right and after several months, I was about ready to admit defeat when I stumbled upon a photo on facebook that a friend of Kara’s mother had taken of Kara while visiting the zoo. The reflection from a glass wall caused a bit of a lighting problem but otherwise it was perfect! I contacted Sherri and she made arrangements to obtain a high resolution image and permission to use it.
Q: Once you had taken the photographs what step did you take next?
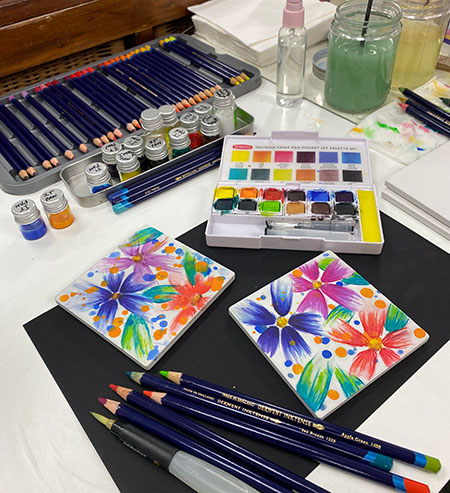
A: Once I had my reference photos, I did a few thumbnail sketches to finalize the composition and then began to draw the final outline. Once I was happy with the outline drawing and had transferred it to my quality drawing paper (Rising Museum board, 2ply), I began to explore colour choices for her skin tones. My reference photo for her face was less than ideal because there was a bluish glow from a glass wall so I needed to use other references to give me more information so that I could achieve the correct skin tone. I think this goes a long way to gaining a likeness, it can’t be too pink or too sallow. I chose the main colour family by placing some pencils on my reference images to compare to. For Kara’s skin, I chose colours from the yellow orange hue family along with some analogous ones to create shadows and highlights.
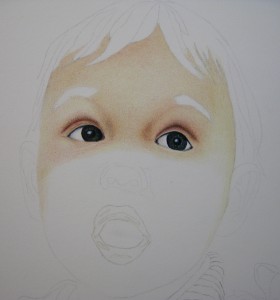
Step Two
Q: What colours did you use for the shadows and highlights as well as the main colour of the skin?
A: For Kara’s skin, I chose Prismacolour #997 beige for the main colour of her skin, and some analogous colours to create the 5 major areas of light and shade; #914 cream for the full light areas, #927 light peach and #939 peach to warm the beige and to create gradations and any subtle shadows. For the darker tones, like in the nose area, I used #941 light brown umber and #943 burnt ochre to warm them. I also used my cream pencil when I needed to blend those colours in. For the darkest tones like the cast shadow under her nose I used #947 Dark Umber and #937 Tuscan Red to warm it. For her rosy cheeks, I use a colour choice in my red hue family, #926 Carmine Red
Q: How did you begin the creation of this portrait? Did you lay out the shadow shapes first?
A: When drawing a portrait, i mostly begin at the forehead and work my way down. In this instance, the first thing that I did was lay in the cream colour in the full light areas and along the right hand side outside edge of her face. Then, I mostly used beige as I worked my way down her face. I warmed it up a bit with light peach and began creating some of the light shadows that give form to her face with it and peach. Then I established the main shadow shapes around her eyes, nose, mouth and chin, being careful not to go too dark to begin with. Slowly, as the layers were built up, the face began to take form; it is like almost like sculpting.
Q: How many hours did you take to create this artwork?
A: That is a tough question because I lose all track of time when I am drawing. It took me a very long time though, I would estimate 90 to 100 hours of drawing and more if I include preparation time.
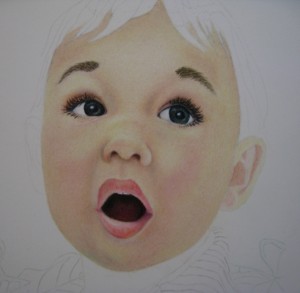
Step Three
Q: Do you have any special tips or suggestions for anyone who is just starting out with coloured pencil that you would like to share with us today?
My main advice for anyone new to the medium is to be patient with yourself especially if you are currently working with graphite pencils. Colour pencil pigment is different that graphite and so it takes a bit of trial and error to successfully make the transition. At first, your drawing might appear a little bit disappointing; in fact you might even think it is awful! But as you concentrate on applying the pigment, using the main techniques of layering and juxtaposing and using colour to indicate tone, your drawing will begin to take shape as you slowly refine it. Persevere, give yourself permission to play and before long you will be creating beautiful artworks in glorious, luminous colour pencil!
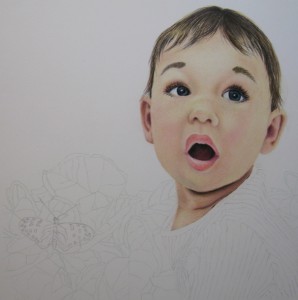
Step Four

As with everything you do it’s another amazing endeavor. Then of course there’s the unending talent. This is fantastic. You ARE a rock star!