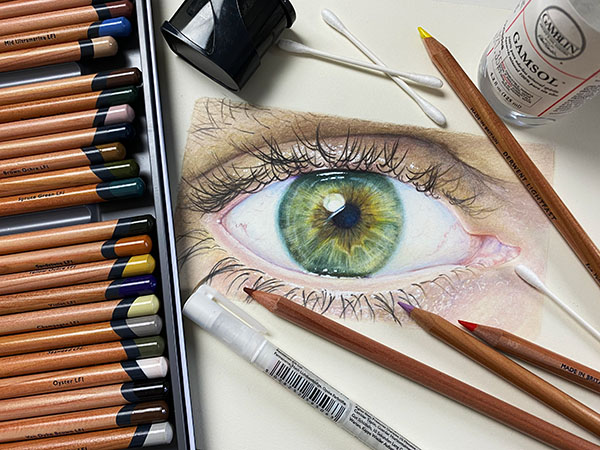
Drawing supplies
- Good quality drawing paper (such as St Cuthberts Mill Saunders Waterford HP)
- A HB Pencil (to draw the outline)
- Coloured Pencils (ideally a professional quality wax based brand such as Derwent Coloursoft)
I use and recommend Derwent Coloursoft coloured pencils and St Cuthberts Mill Saunders Waterford HP but you can use whatever you have locally available.
The Colours you need

The pencil numbers are from the Derwent Coloursoft range (and of course the C720 is white). If you haven’t got Derwent Coloursoft then just match as closely as you can.
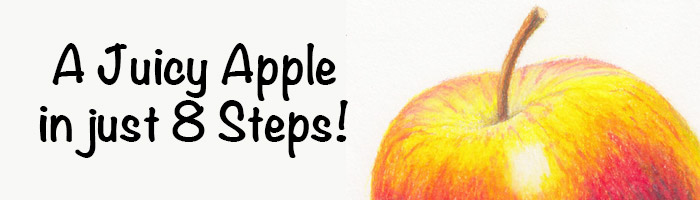
Step 1: Draw the Outline of the Apple
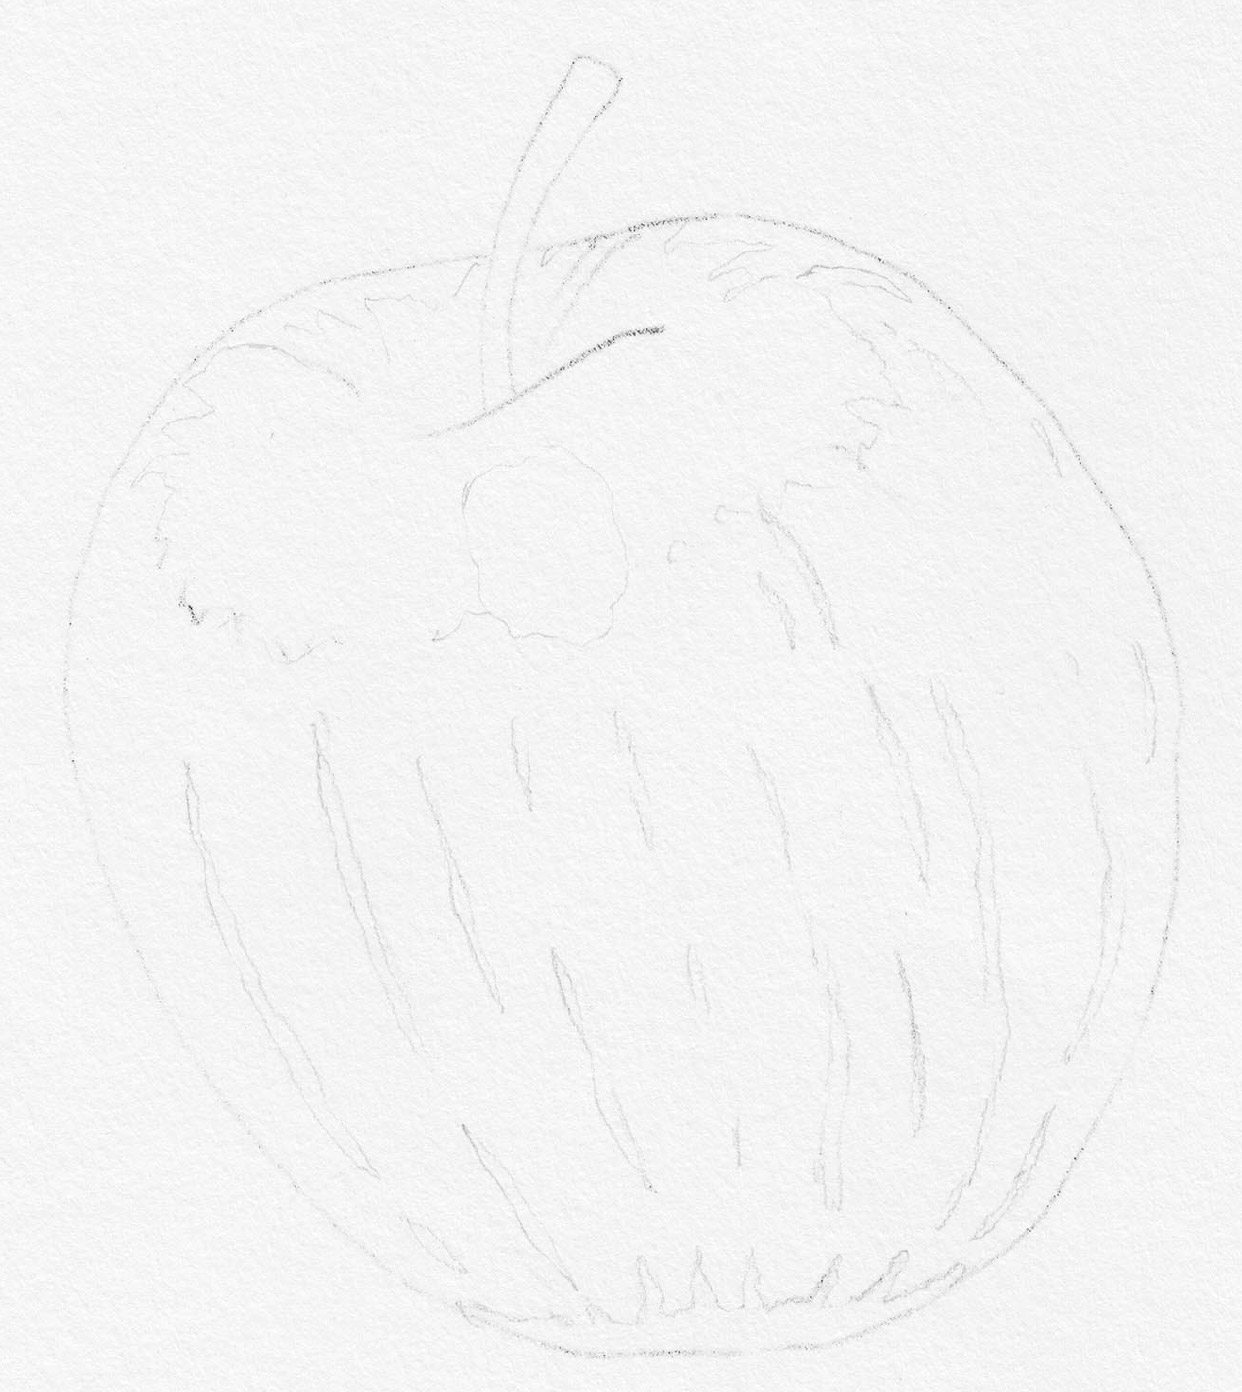
I’ve supplied you with the outline drawing of the apple so you can get to the colouring part faster. You can either copy it by hand or trace it onto your drawing paper. It’s up to you. (again you can click the image to see a larger version)
Step 2: Curved Hatching stroke with red
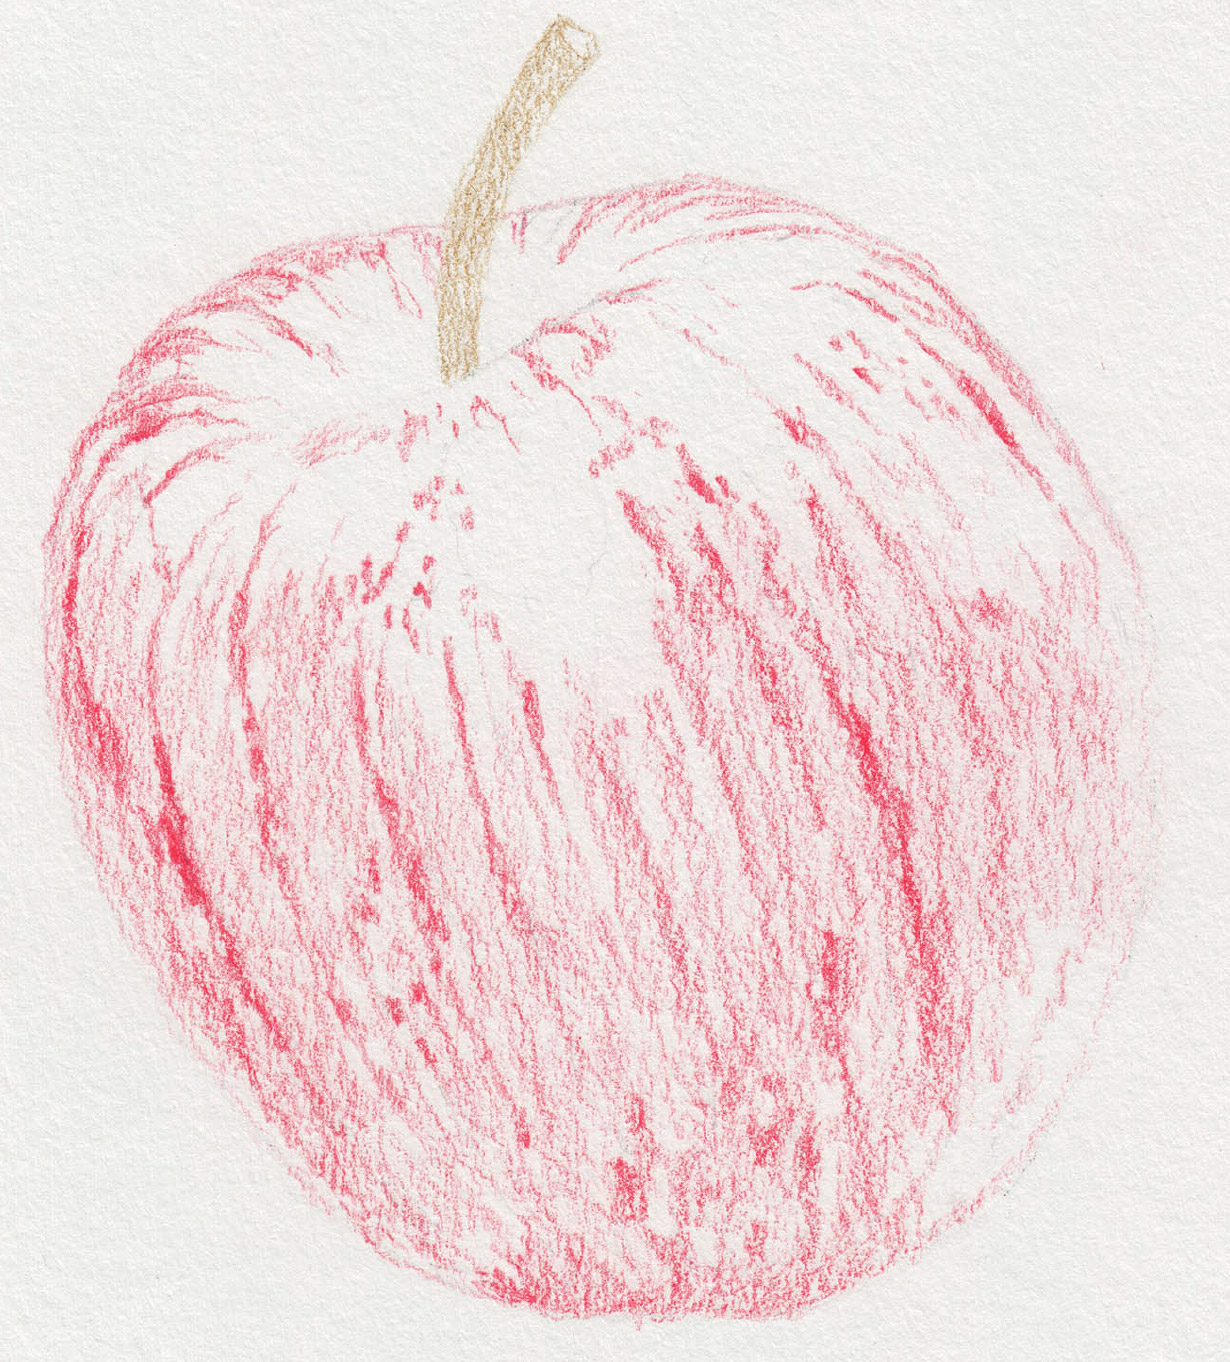
- Begin with a blunt tip using C120 (Red.)
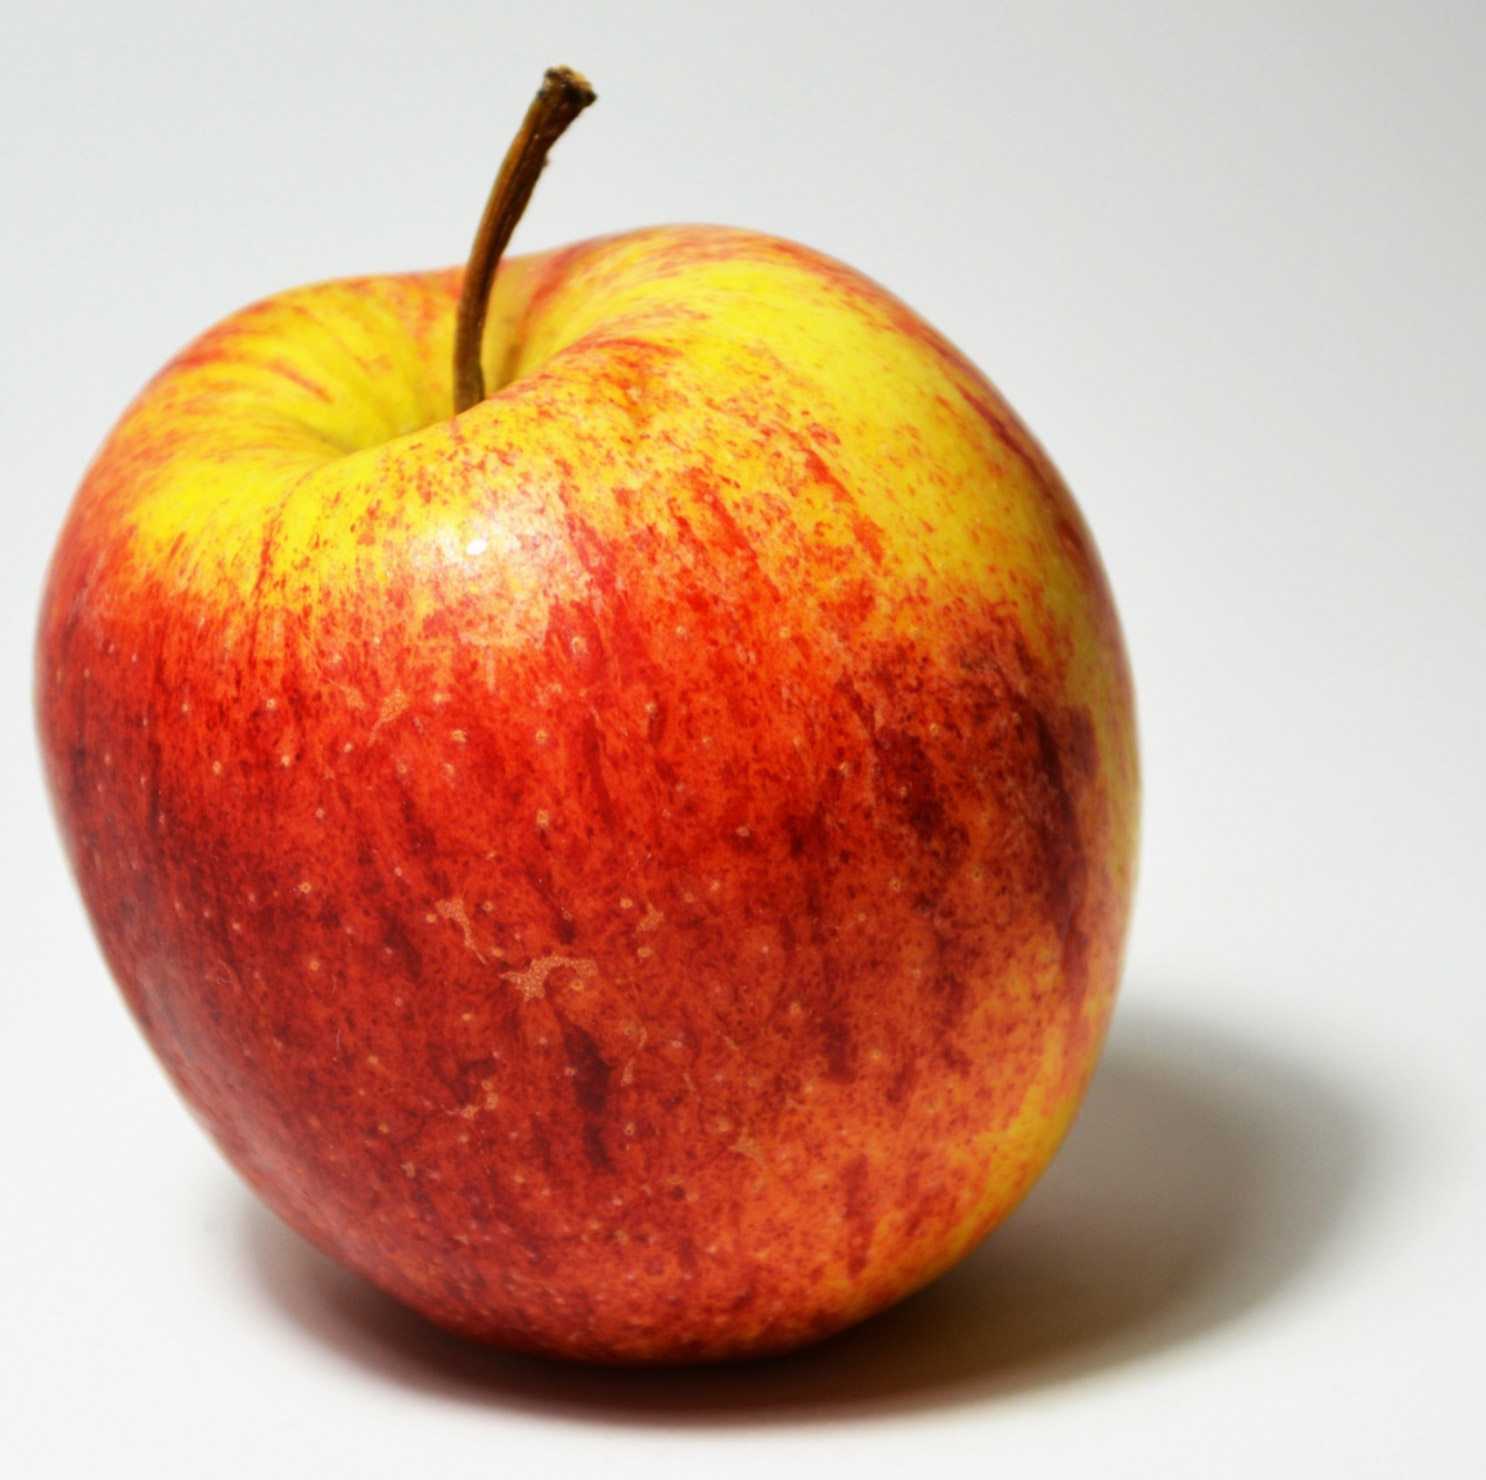
- Pull some lovely long hatching strokes down the apple and curve your strokes towards the left on the left side and towards the right on the right side. In the middle it will be almost straight. You can leave some gaps between your strokes and only press super lightly.
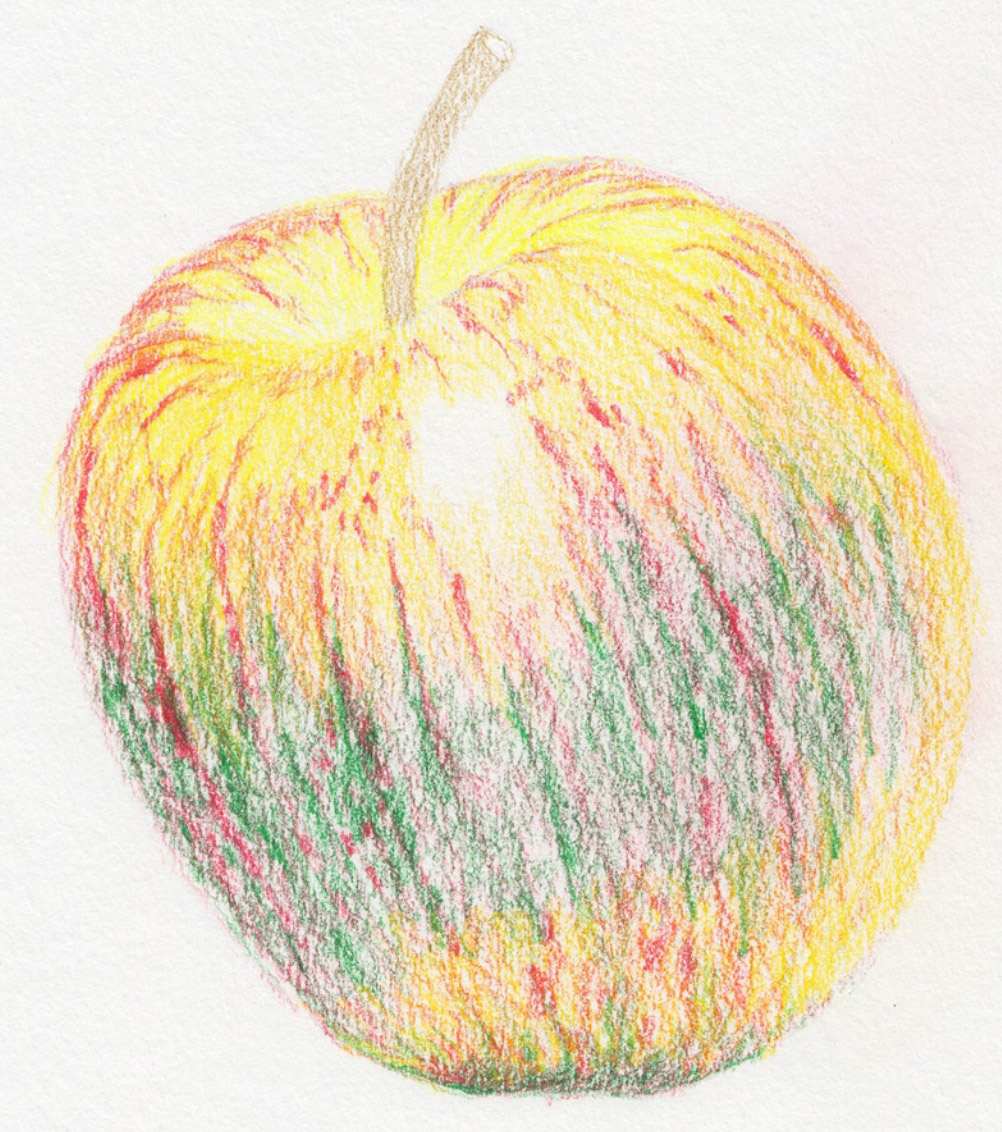
- Make squiggly thicker lines to look like markings on the apple. See the Photograph of the apple. Leave the white full light area with no colour.
- Colour the stem with C500 (Lichen Green.)
Remember to press softly!
Step 3: Add cool and warm yellow over the red markings
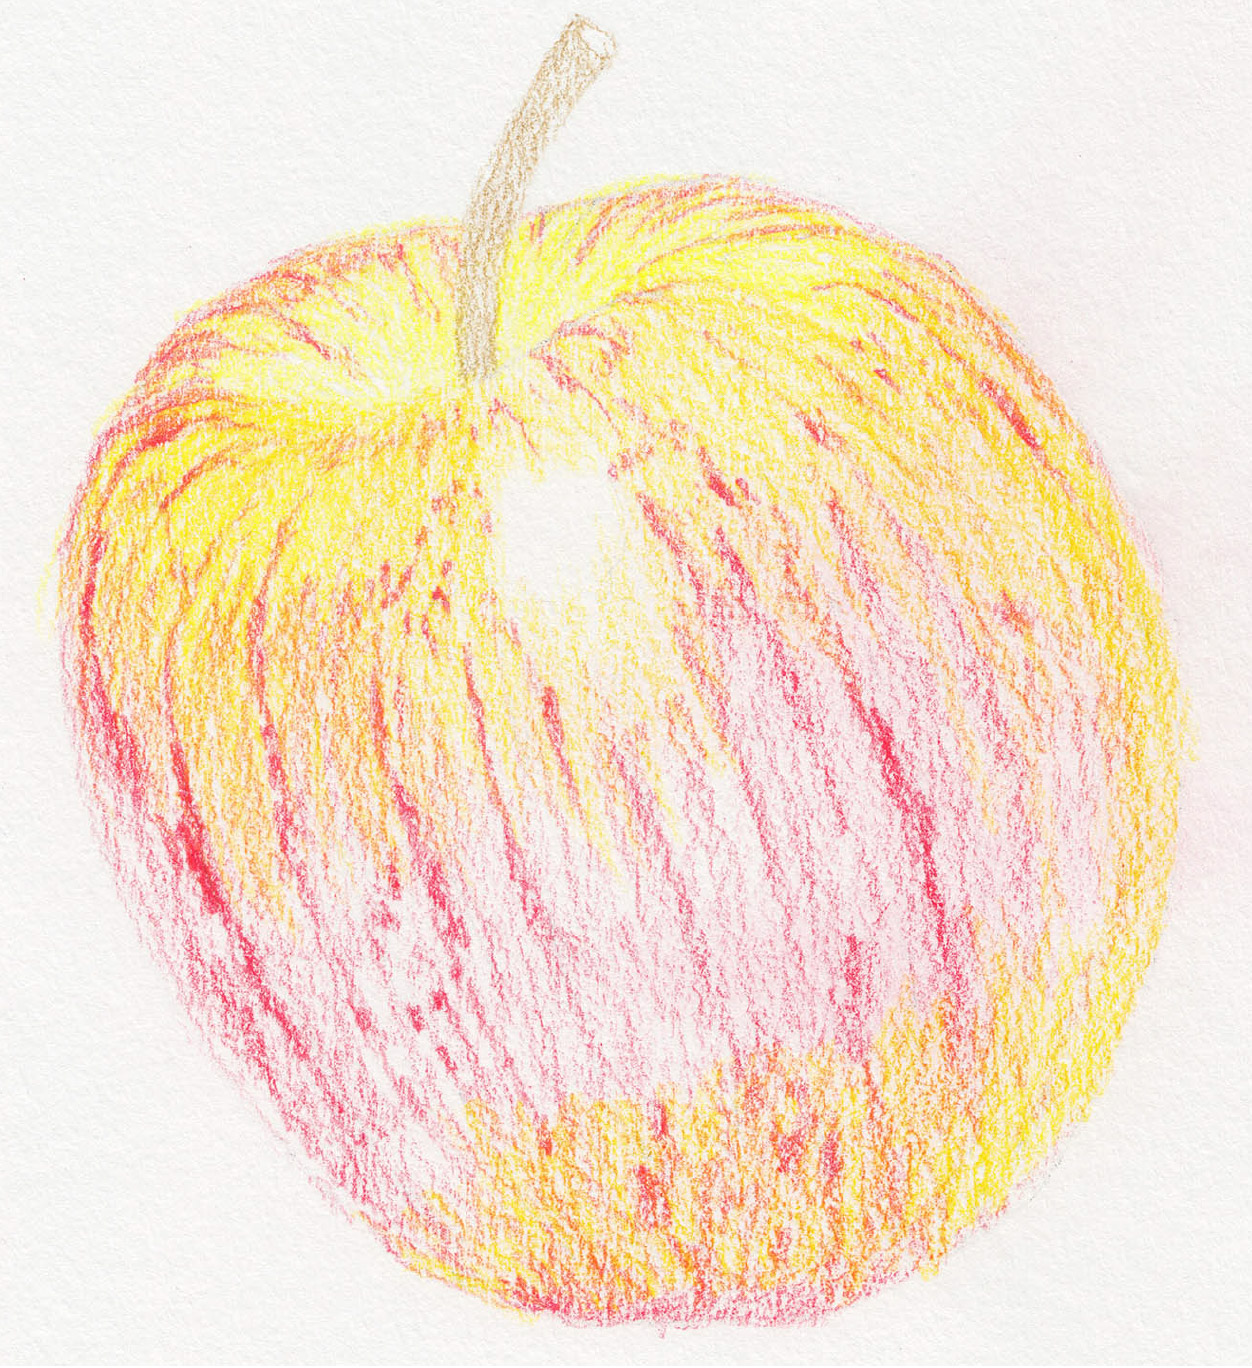
- Using a blunt tip, gently add some of the colour C020 (Acid Yellow which is a cooler yellow) over the top of the red markings in the area behind the stem. You need to keep the yellow cooler and all the colours paler in that area so that it goes back into the distance. Don’t press too hard so that you can some space on your page add more colours later.
- Colour the top of the apple in the area in the front of the stem and down the right side of the apple as well as at the base of the apple using the colour C040 (Deep Cadmium which is a warmer yellow so it will bring the area forward more.) Look at drawing below and the photograph of the apple often.
- Colour the white area with C720 (White.)
Step 4: Underneath layers and scribbly strokes
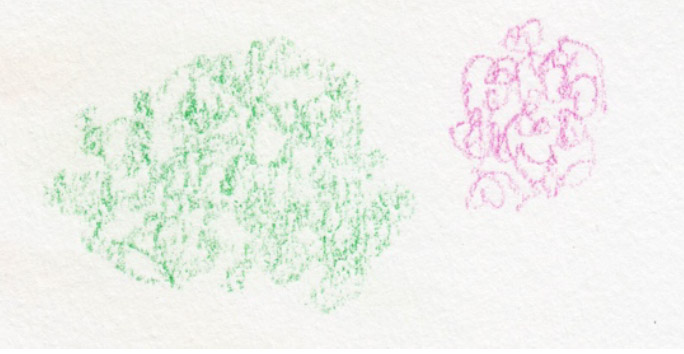
- Add your underneath layers of colour to prepare the middle and very base of the apple to become the darkest area later. That will be your shadow edge area. Instead of using black for darkest areas, remember that you can use the complimentary colours on top of one another to darken and dull an area (to send it back into the shadows.) The apple will be red in the middle area later so we can use C420 (Green) for the darkest markings in the middle area. Create the same longer shaped patters as well as lay your pencil on the side and scribble to make more texture for the middle area of the apple.
- Use some C140 (Deep Fuschsia) in scribbly circular strokes like in the examples you see here. The Fuschia is slightly cooler colour than the red because it has a bit of blue in it. Therefore it’s a good colour to use beneath the red for a more delicate transition of colour between the red and the green.
Step 5: Darker markings and circling strokes
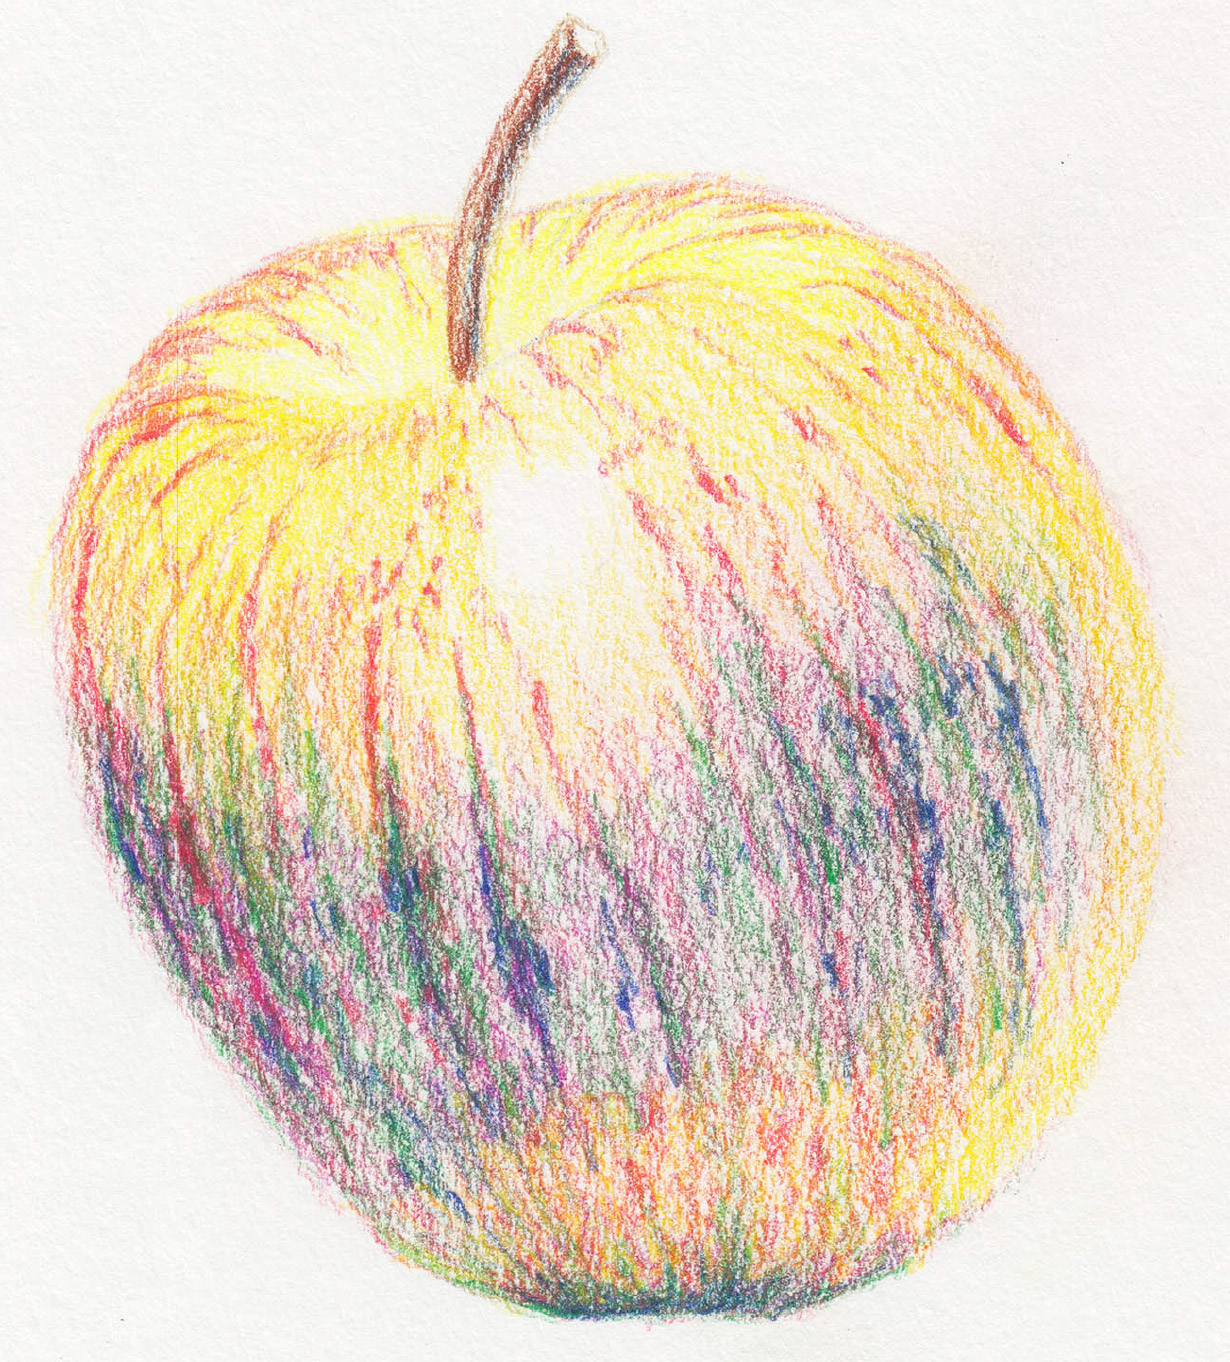
- Add some darker coloured markings using C300 (indigo) which is a lovely deep blue to gently darken the markings in the shadow edge area (just below the middle of the apple.)
- Create some circling strokes through the centre of the apple, with the same colour pencil laid on the side.
- Add some of the same blue to the area at the bottom of the apple.
- Colour the stem by using your colour C520 (Dark Brown) to create the shadow edge just in from the right side.
- On the left side of the stem add some C610 (Dark Teracotta.)
Step 6: Over the top
- Use the colour C180 (Blush Pink) over the top of the red markings in the area at the top of the apple behind the stem – to send those markings back into the distance a bit more.
- Then go over the whole area with your cool Acid Yellow (C020) but don’t press too hard yet.
- You can then add some white to really soften the area and send it back into the distance even more. Use your white pencil and burnish with quite a bit of pressure using a blunt tip. If you colour sideways a bit with the white you will help the pinkish markings to blur a little and that also sends things back into the distance.
- Add more colours to the stem as you see here or the photograph.
Summary – to send the top back area of your apple into the distance more will help your apple look more rounded and realistic. You are using the principles of lighter cooler colours with blurred detail to achieve this goal.
Step 7: Fill the whole middle section
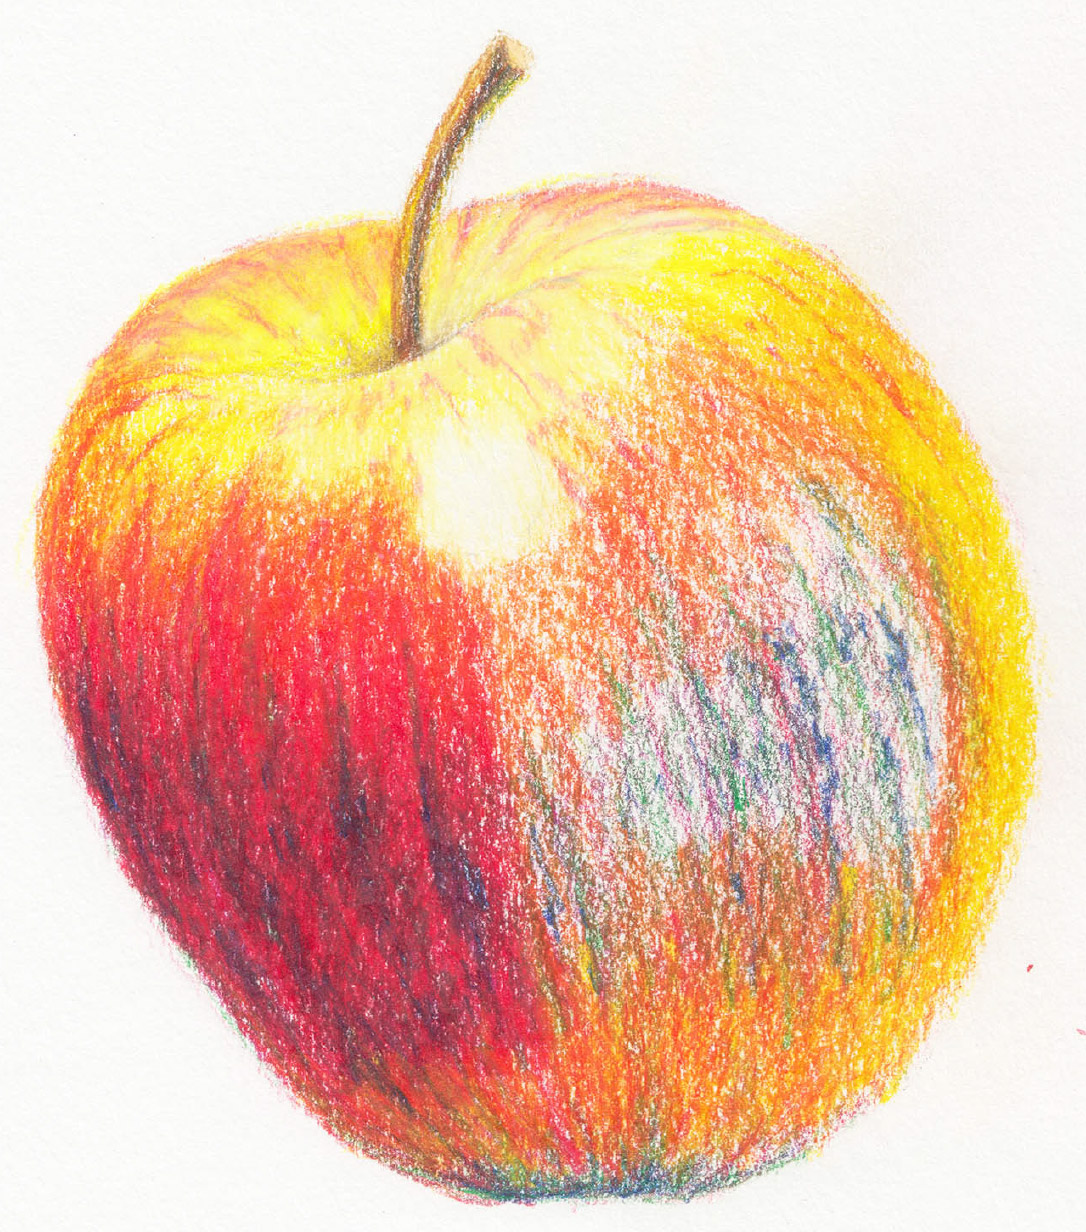
- During this next stage, it’s time to put on some Bright Orange (C080) to help the red blend nicely into the yellow. Travel around the outside edges of the yellow areas and leave the centre darkest area free for red.
- Add the red to the inside of the darkest area – go ahead and fill the whole middle section now – right over the top of all of those colours beneath. The colours beneath are our textures. The red is translucent so those shapes will stay there. I just started the middle section here in this image – you can continue and colour the whole middle section with red (C120.) Use long curved strokes travelling the full distance and quite a lot of pressure, with a little bit blunt tip (so your pencil doesn’t break.)
- Add more of the warmer colour yellow (C040) to the outside of the apple and some beneath it in the reflected light area. Look for where you see yellow in the drawing below and in the photograph of the apple.
- Add more yellow (C040) to the top front area of the apple then some white over the top (right in front of the stem) and more white into the highlight.
Step 8: Add the final details
- At this stage you can keep on adding any of the colours that are needed to bring your apple to completion. The darker areas beneath should provide your apple with the shadow edge area. Remember that you may not see the shadow edge very well in the photograph because the camera doesn’t capture everything we see. Add your shadow edge area as you know it should be – darker than the rest of the apple. You can use lots of circling now with a blunt tip on the pencil. You can do this with your C300 Indigo or C120 (Red) or both.
- Add more yellow and some C500 (Lichen Green) to the outer right side edge of the apple and the base of the stem to send those areas back a bit.
- Add some tiny finishing touches; those little pale pinkish beige coloured markings. You can use the battery operated eraser if you have one. Prepare it to a lovely pointed tip by rolling it across sandpaper on a slight angle (while its turned on.) Erase the markings with the tip of the eraser and then colour a bit more into the areas using some C180, C500 and white.
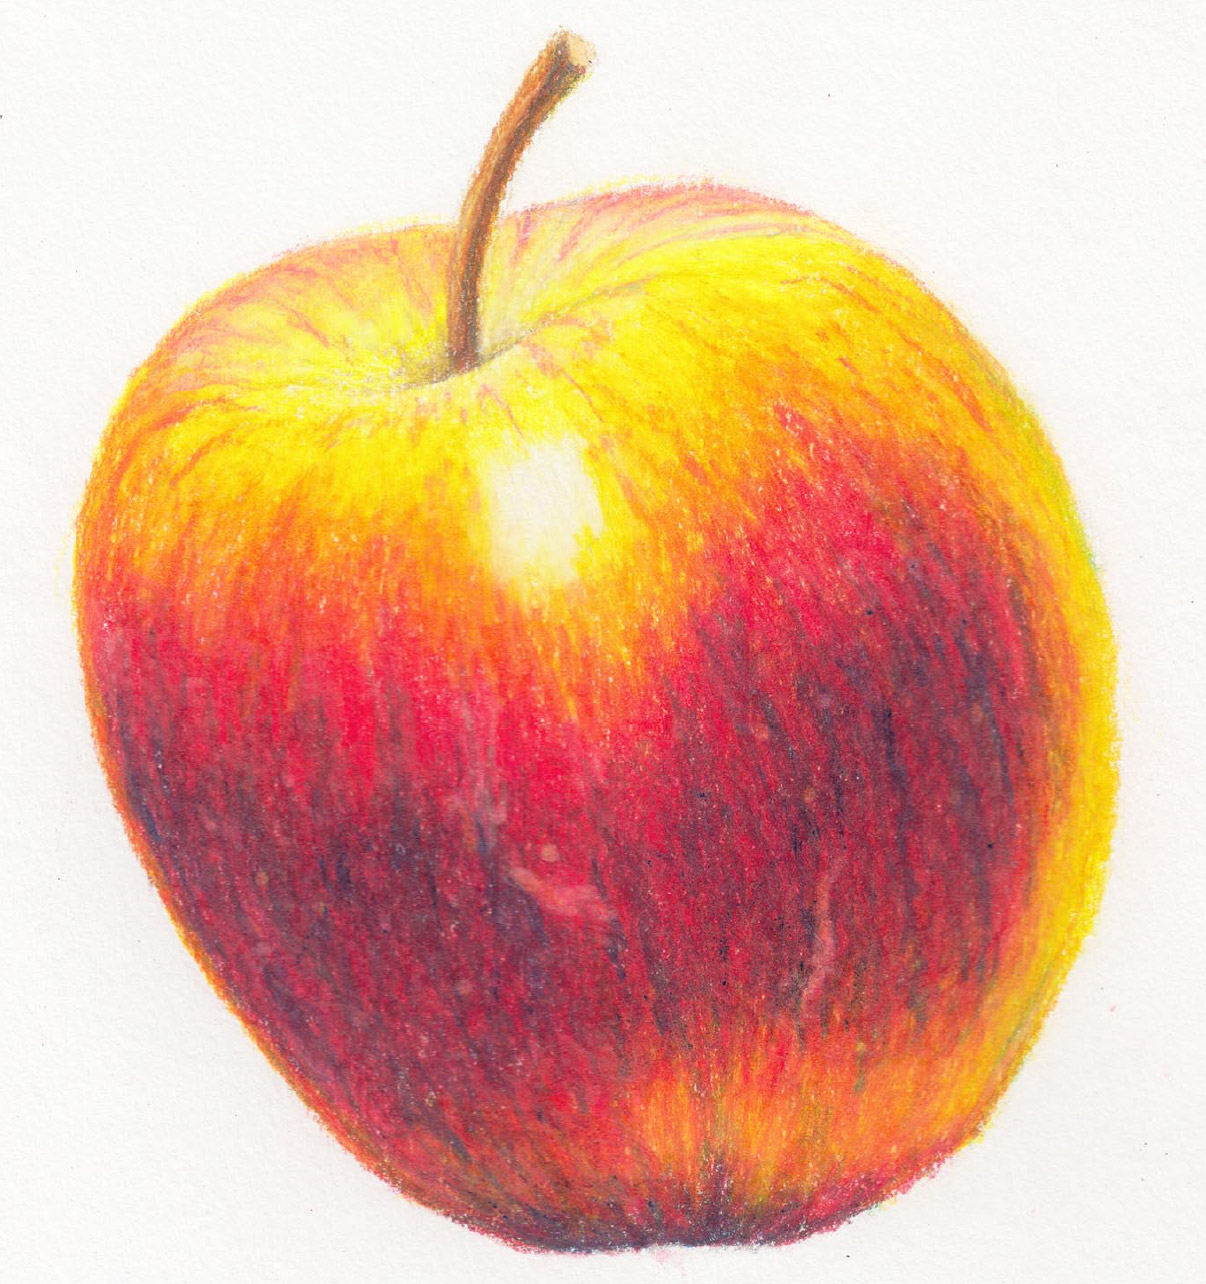
Tada! You are finished your Juicy Apple, well done!
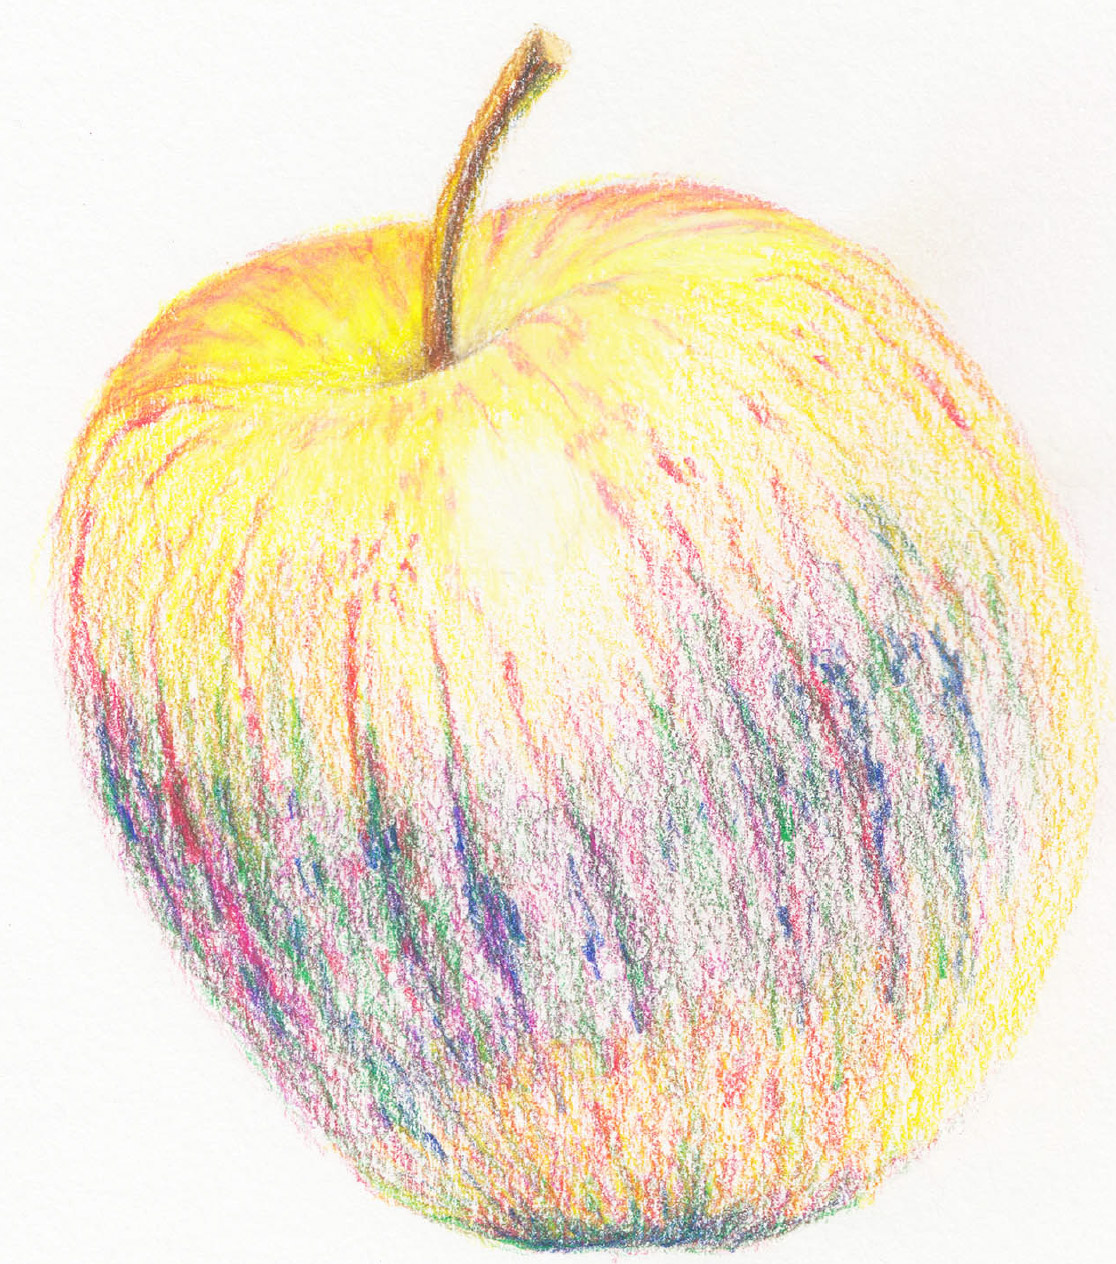
Take your skills to the next level. Hyper-realistic Apple!

By applying more advanced techniques and more colours you can achieve an even more realistic drawing. The apple drawing above in included in the Coloured Pencil section of my Complete Online Drawing Course.